Make upgrade image file
In the previous tutorial, we used the Download and Debug menu to run the program, but it does not solidify the program into the device. If you unplug the TF card or power off and restart, the program will Automatic recovery. If you want to firm the program into the device, we can package the program into an upgrade file. After the device is upgraded, the program can be solidified inside the device. Once the power is turned on, the program will be started by default.
Operation specific steps
First we need to configure the output directory of the mirror.
Find this button on the toolbar

Click the black drop-down arrow next to it, and select Path Configuration in the pop-up menu
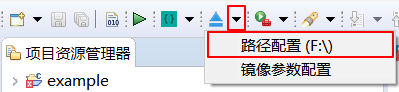
In the pop-up box, select the output directory of the image file, and click OK.
In the above steps, we have configured the output directory. Now click the button in the figure below to start compiling. It will package the compilation result and generate the update.img file and output it to the configured directory.

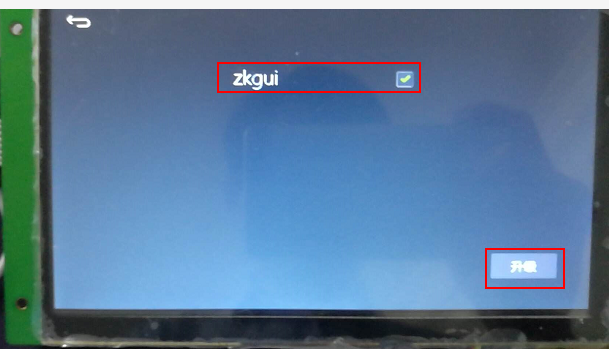
fter the update.img file is successfully generated, copy it to the TF card (Note: Before use, please format the TF card in FAT32 format), and insert the TF card into the machine. Power on again. At this time, when the system detects the files in the TF card, it will start the upgrade program. In the interface shown in the figure below, check the upgrade items and click Upgrade. After the upgrade is completed, remove the upgrade card in time to prevent repeated upgrades.
[!NOTE] Note: TF card only supports FAT32 format
If the screen is damaged or the touch is inaccurate, which makes it impossible to upgrade by clicking the button, then in this case, we can useAuto Upgradethis way Upgrade our system.